Here we'll be keeping track of how we're doing, any questions that have arisen, and hopefully some nice pictures to show how the project is going. Any thoughts or comments, do let us know.
(Well, the method is on holiday - I'm still in rather rainy Brighton. But you can live vicariously!)
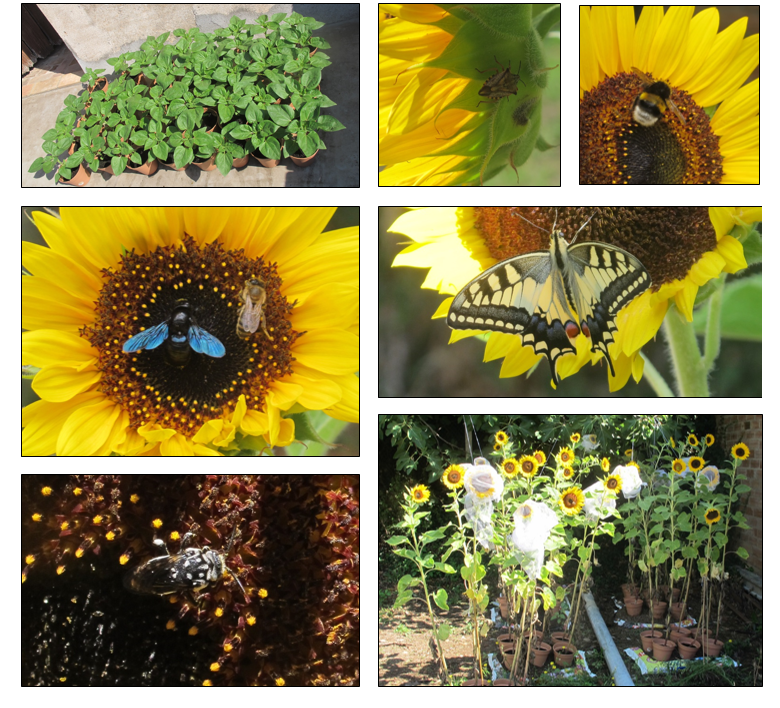
Here are some photos from Antonia Taylor, who is using a modified Bees 'n Beans protocol for her Baccalaureate project - in sunny Spain, with even sunnier flowers as the experimental plant. Looks like an excellent setup. She's snapped some fantastic pictures of flower visitors over the course of the experiment, and kindly agreed to share them.
Hope your teacher is as impressed as we are, Antonia!
Now that flower spikes are actually starting on the radish plants, a couple of questions have come up:
1) 'Turnip'-like roots. The radishes do produce a large white / green root that can look remarkably turnip-like - don't worry! This is normal, as once the flower spikes get going the plants often lose most of their leaves. The big root supports the flowering and seed production, although it isn't edible.
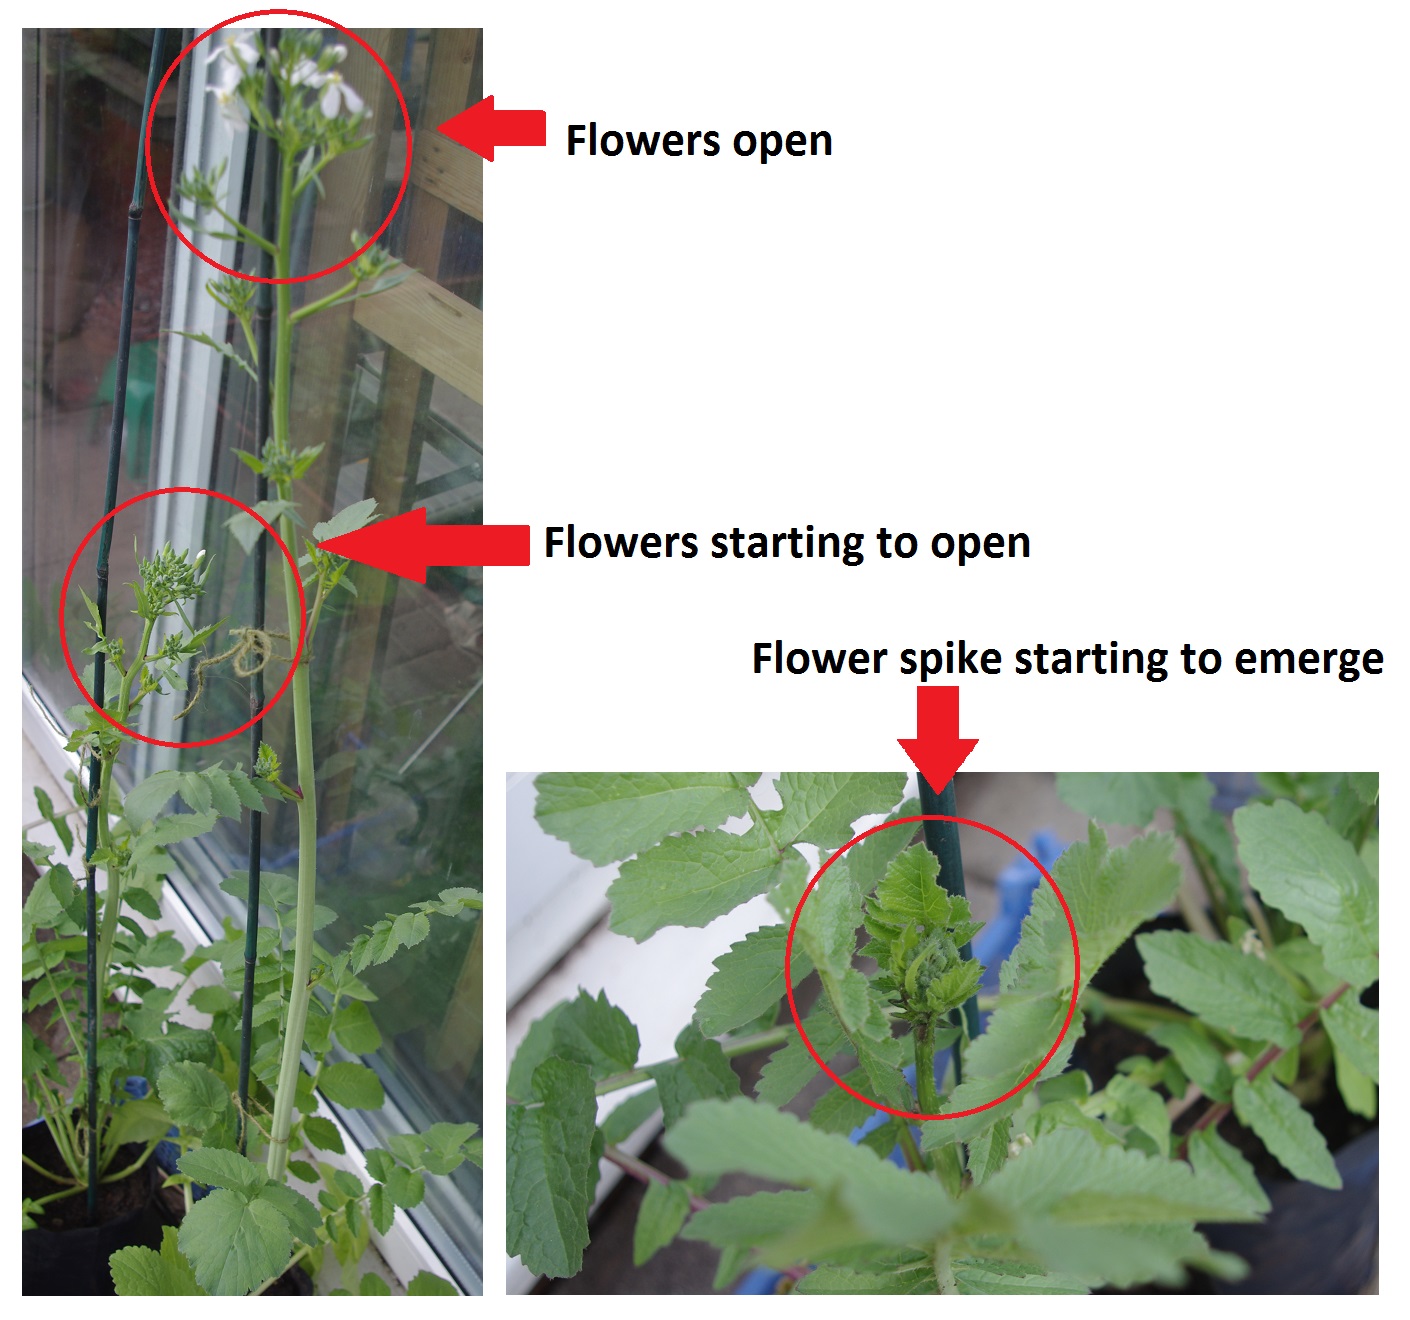
2) Tall flowers. The flower spikes on the radish plants get get pretty tall, and may need a full-length garden cane to support them. But this doesn't mean you need as much fleece to keep the bagged plant covered as you might think, as the flowers will still only be open at the top of the plant, and you do not need to cover the leaves at the bottom. The photos below show how to move fleece up the plant as they start to stretch up:
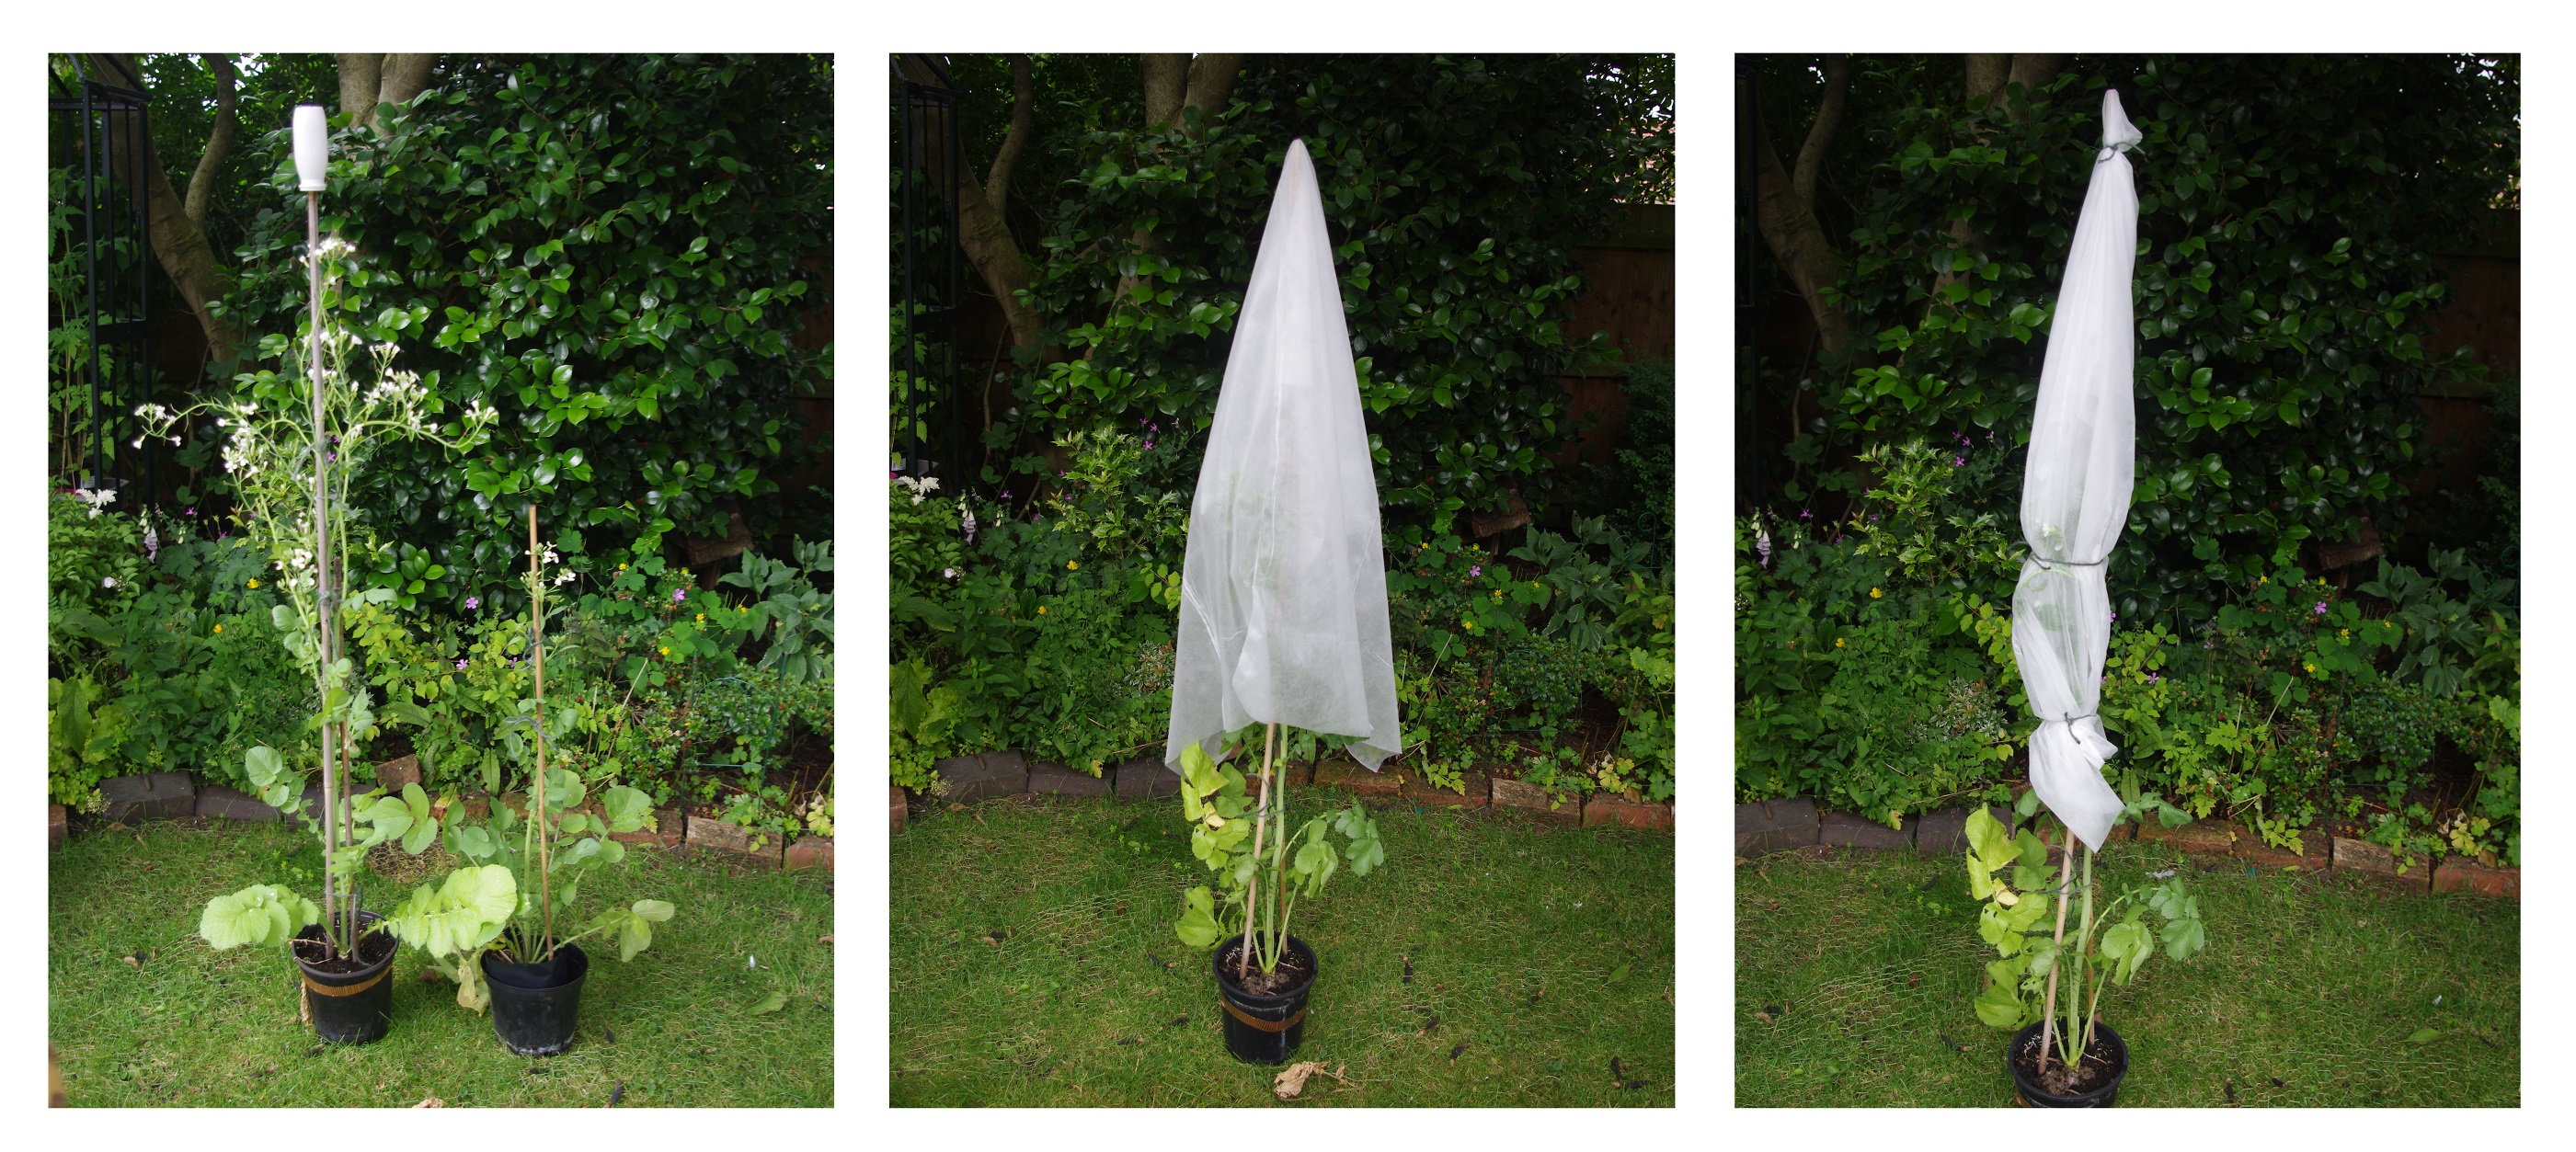
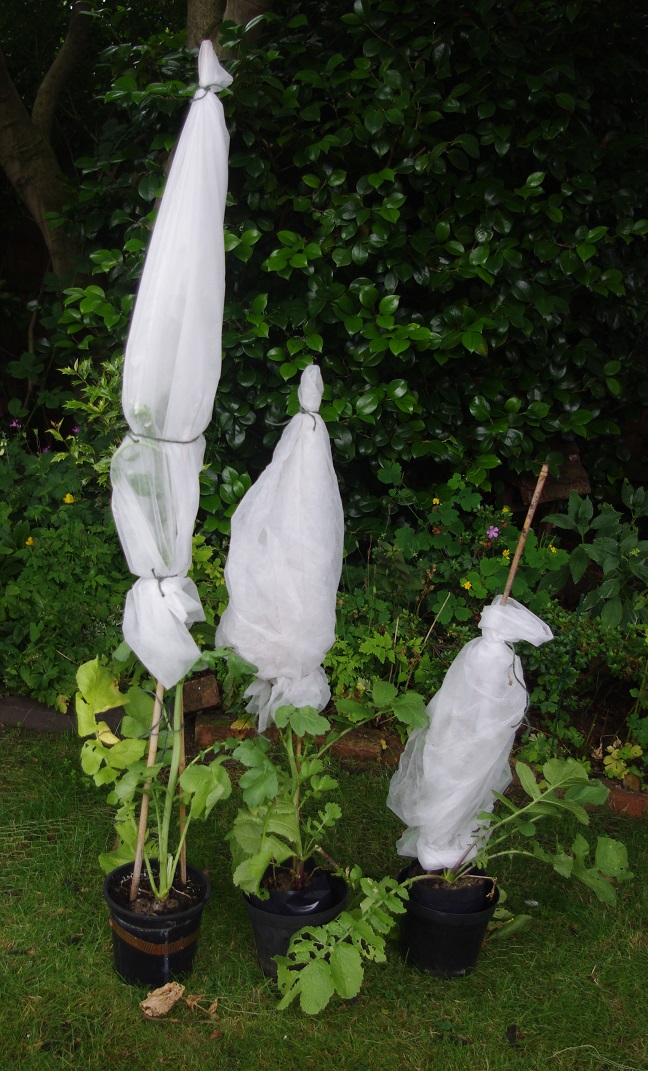
So your radishes may well end up with a rising hat as they get taller!
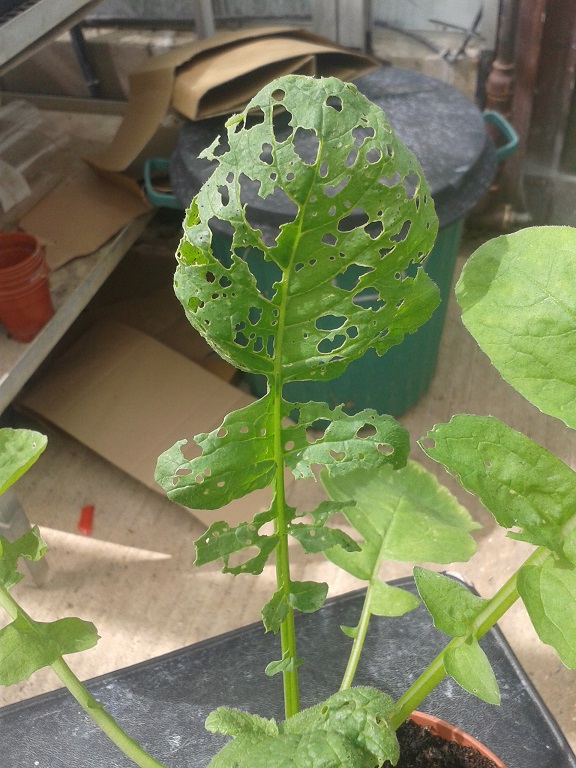
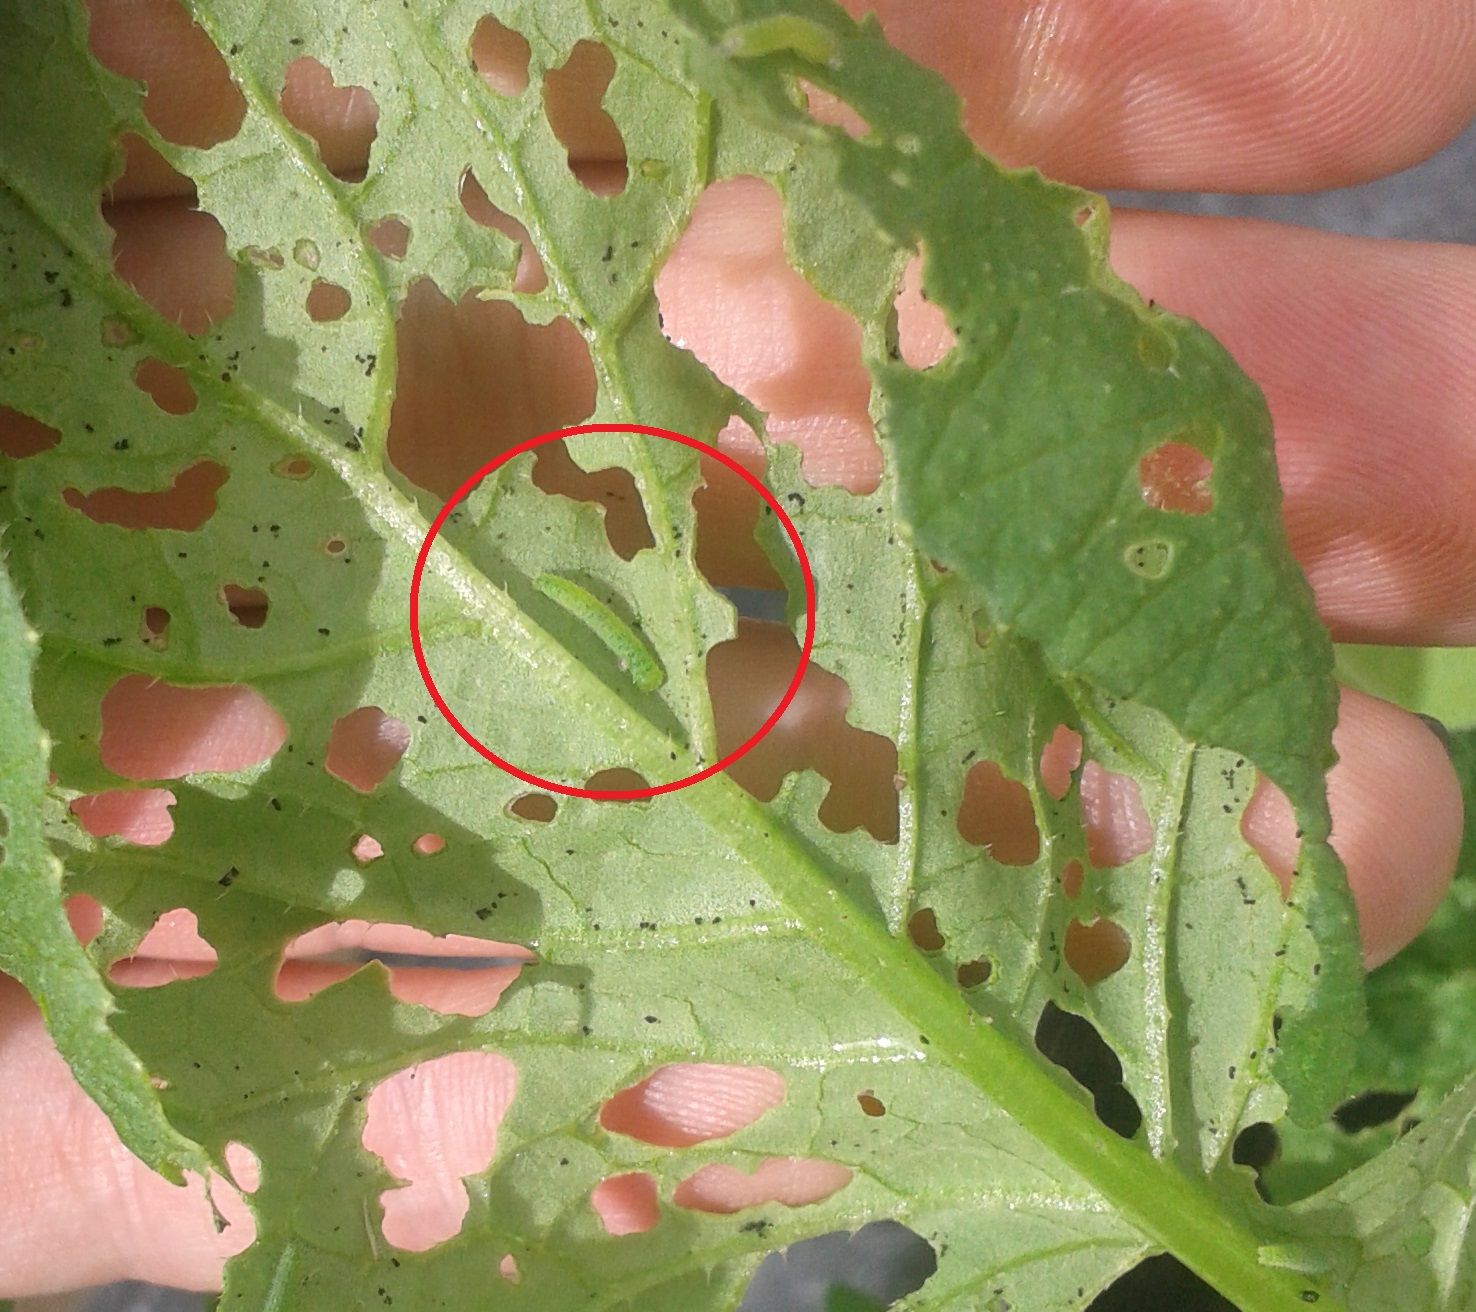
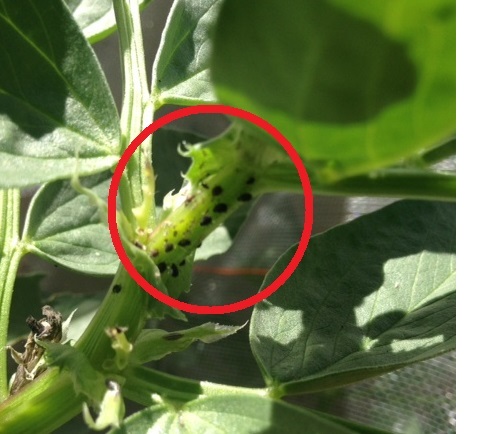
3) Pests! At this stage the radish leaves should be pretty resistant to slugs and snails (although they will probably still have a go at damaged or dying leaves), but because it has taken a while for the plants to actually get going this year, this means they are at risk from cabbage whites and other butterflies that lay eggs on brassicas. If you start to notice little holes in the leaves like those below:
I’ve had a few queries asking what to do if there are not four radish plants flowering at the same time.
It does seem that under normal garden conditions there is quite a lot of variation in when the radishes flower, even from plants that were sown at the same time. For example one plant might be much further ahead of the others.
These problems did not happen last year when we first used the plants under more controlled conditions, so many thanks to those of you that have raised the questions. An important aspect of this year’s radish experiment is to assess how they behave in a large number of domestic growing spaces so knowing what is happening out there is really important.
The laboratory group has discussed the problem and I have provided an advice sheet (2 pages) if you are having issues with getting enough flowering radishes. This sheet can be downloaded here, and tells you how to modify your experiment to work around uncooperative radishes!

I've had some handy photos sent in showing the radishes at different stages, so this is what you should be looking out for. The plants do seem to be being quite variable in how they grow and how fast they produce a flower spike - I am having a think about modifications to the protocol that can be done if yours are being uncooperative, and will get back to the list this week with my ideas.
For now though, thank you Rita, and here are what the radishes should eventually be showing! Click on the pictures to zoom in.
There still seems to be some confusion about the hand-pollinating method (although honestly as long as you're handling the plants a bit, you're probably doing something!). I did promise you all a new video for this year, but due to issues with the editing software, I haven’t been able to make an updated one. But you can watch part of the one from last year to see how to open and close the flowers.
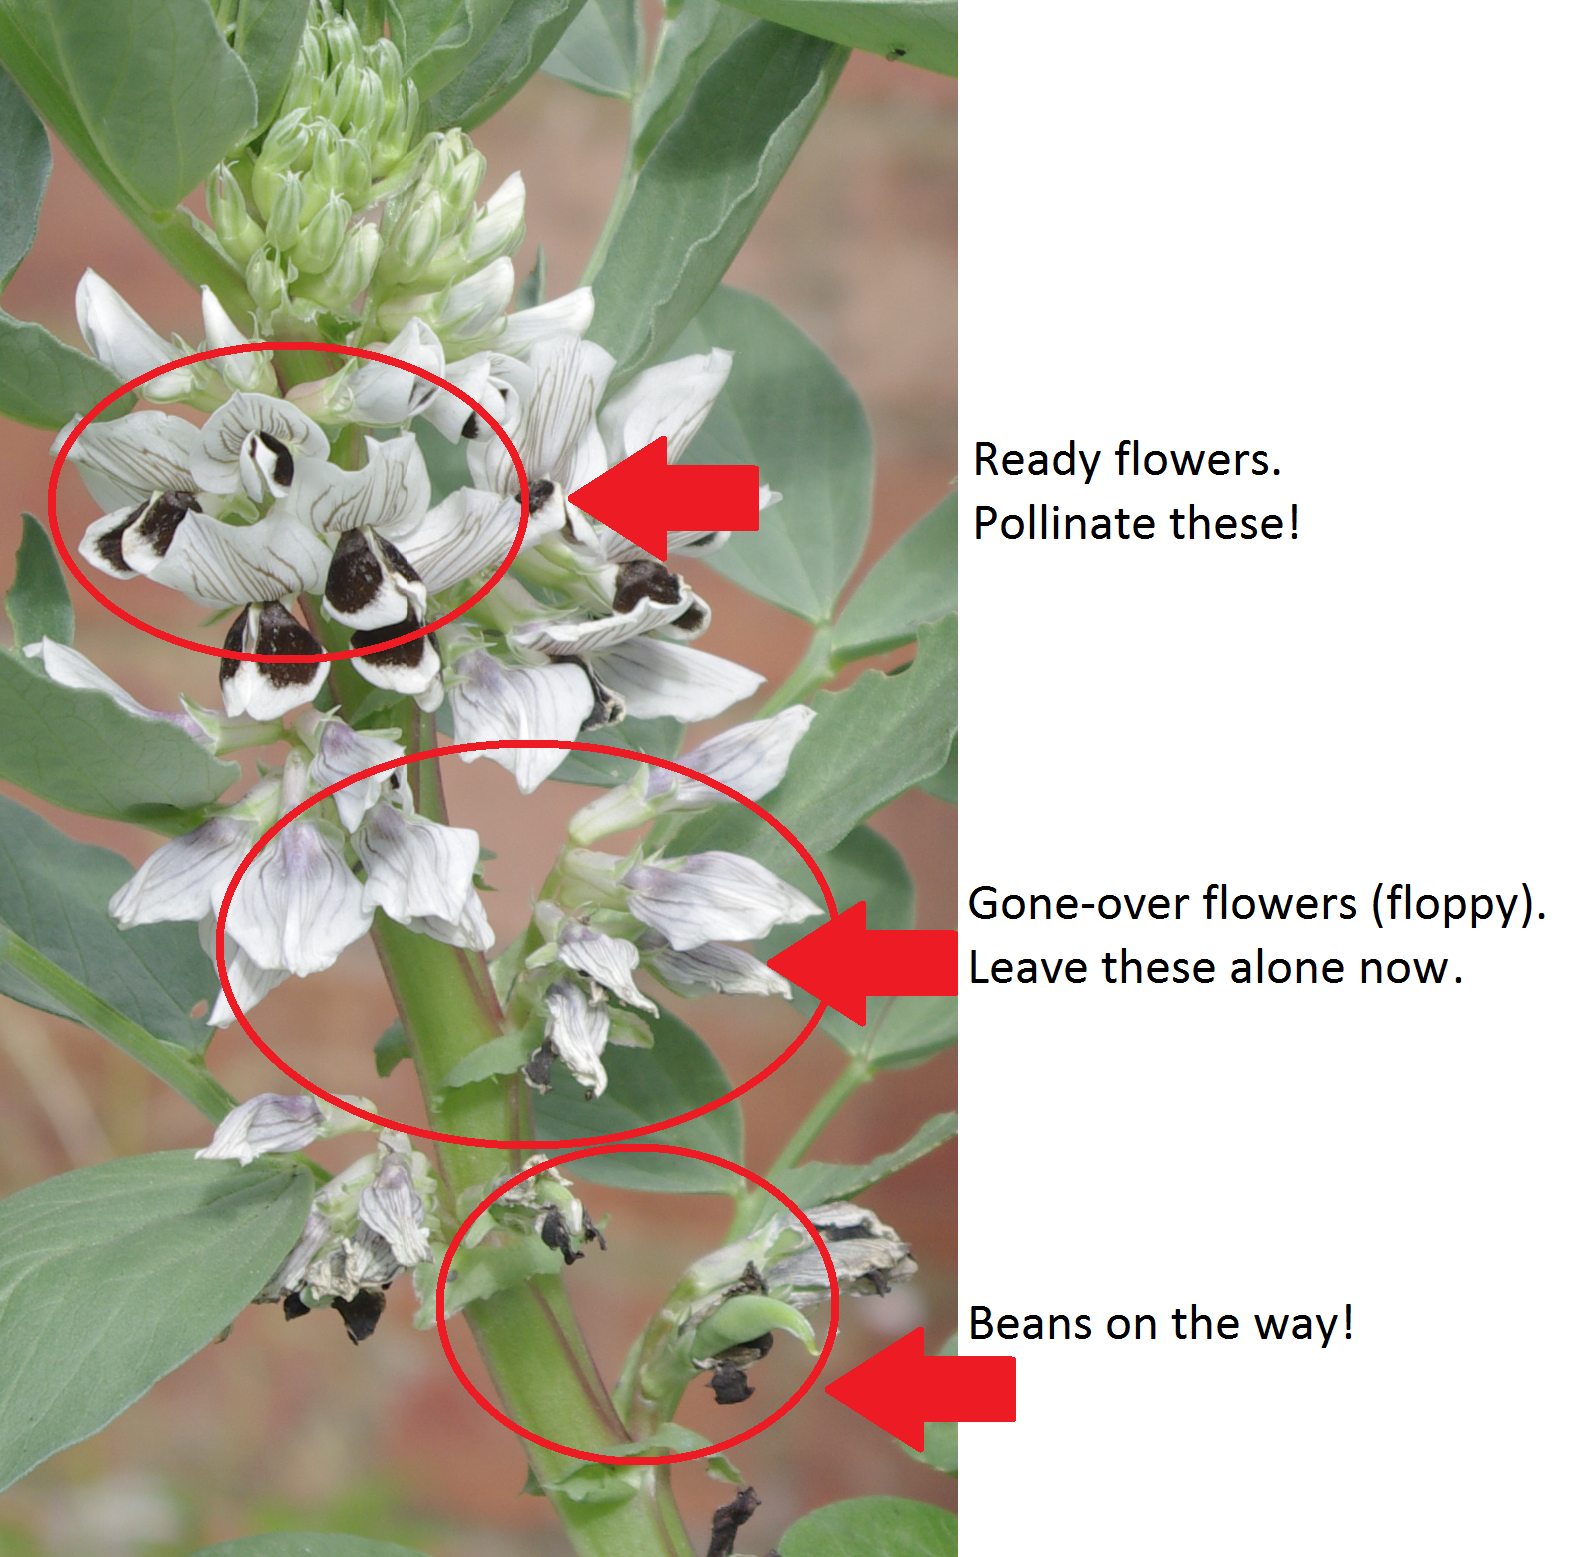
Remember – this year we are NOT trying to cross-pollinate the flowers. Given the flowers last about a week, and you will hand-pollinate twice per week, you will probably handle each individual flower ten times. So if you were doing you hand-pollinating on monday and thursday, for example, you would do:
Monday - Open and close the flowers 5 times.
Thursday - Open and close the flowers another 5 times.
When each flower has gone grey / floppy, you don't need to hand-pollinate them anymore.
Now, while I only have last year's video, you can still see the method of opening and closing the flowers, which is the same. The video below should start playing at 1:48, and you only need to watch what I do until 2:10 (and I do it again 2:38 – 2:48). You don’t need to do the faffing around that happens afterwards with bits of other flowers, as we showed last year that just opening / closing is equally effective!
Back in the office again now, so a couple of updates to the blog now. The first concerning the new pest contender – blackfly!
Blackfly
If the slugs weren’t enough, it’s looking like it might be a bad year for blackfly aphids (well, a good year for the blackfly, not so much for us). These sap-sucking pests can form huge colonies very quickly; like other aphids, they can reproduce asexually and very fast. Heavy infestations damage leaves and even beans themselves, and can lead to a build-up of mold as well as the sucking damage, because of all the unwanted honeydew that they release.
If you start seeing blackfly colonising your plants, you can do several things:
1) If there are not many, squash them. Bit grim, but a swift thumb and a bit of tissue paper will take care of light infestations. As will:
2) Wash the plants. Get a soft sponge thoroughly soaped up with e.g. fairy liquid or similar, and wash the blackfly off the plant. Gentle washing shouldn’t damage the plant, although try not to knock off any gone-over flowers, which are quite fragile. Rinse off with clean water.
3) If you’re getting repeated attacks, it might be time to remove the growing tip of the plant, which is the bit that they are most interested in. If you’ve had 8-10 bunches of flowers on your plant, you probably won’t be getting that many more, so if you take off the top two inches or so then not only will you reduce your risk of blackfly – but the plant can put its energy into fattening your beans.
Whatever you do, and especially if you do #3, please make sure that you do the same thing to all of your experimental plants.
I had also had suggestions from some volunteers that moving a few 'sacrificial' plants like nasturtiums near the beans can offer the blackfly an alternative target (from which you can then squash them as well), reducing the load on the beans.
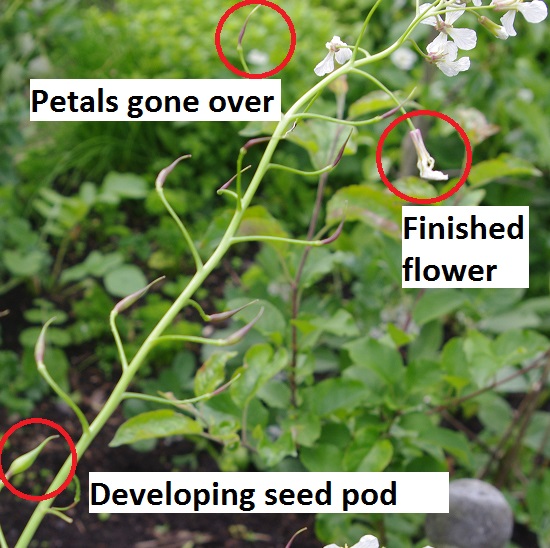
While our experimental radishes haven't got round to making their flower spike yet, we have found some of last year's radishes that have kept going (honestly, I didn't realise they were that hardy - remember that, gardeners!), so here are some photos of the flowers / pods that you will be looking out for soon.

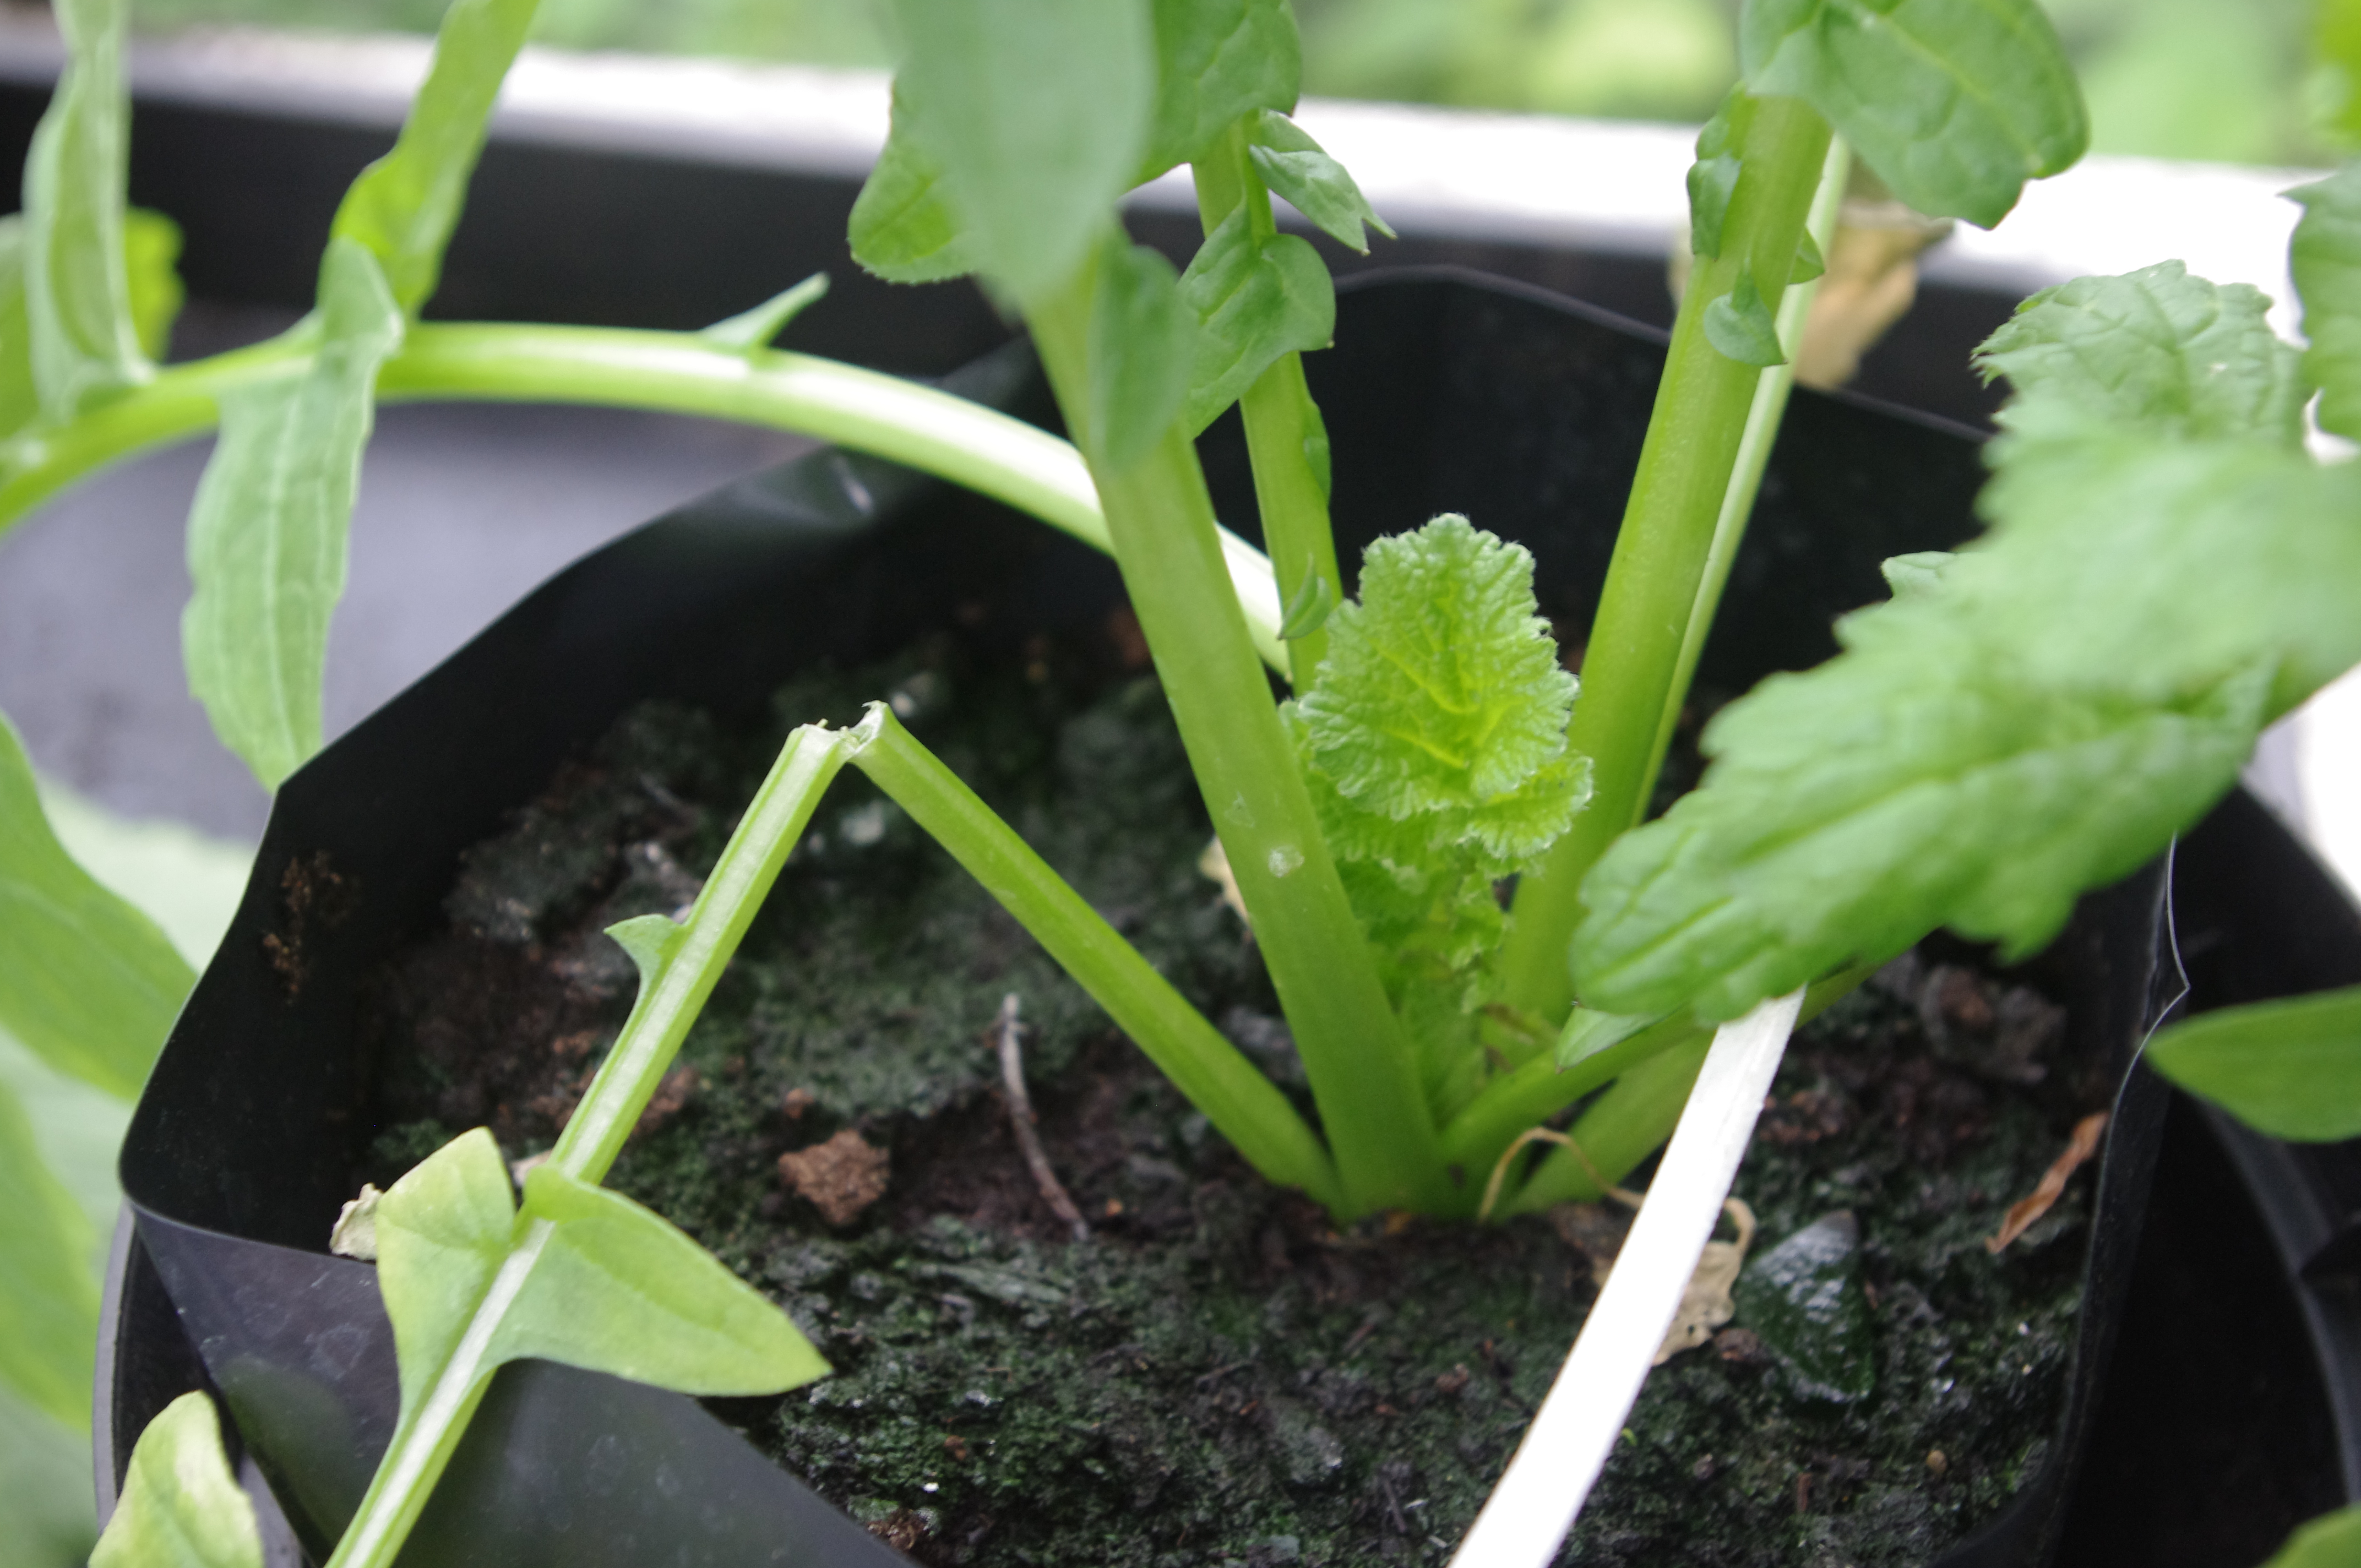
You might also be getting some snapping of the radish leaves, particularly of the outermost leaves. This doesn't seem to be a problem for the plant - the example below has been like that for a while, and the leaf still seems to be functioning fine! Eventually the leaves will probably shrivel up and fall off, while the flower spike is still going; this is entirely normal for these plants. Be aware that the flower spike is also quite brittle, and this would be a problem there!
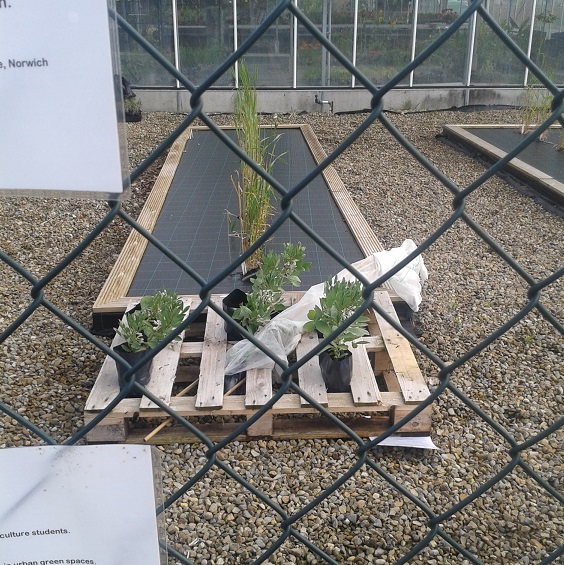
A nice couple of site photos from Askham Bryan College in York, where the beans and radishes are being grown in front of a historic timeline of wheat, whether students are also trialling various sweet peas. Lots of crop science going on - thanks to Sarah for the pictures!

We're somewhere in week 6 -8 (depending on when you started), so some of you might be seeing flower buds on your bean plants, particularly those in the South. If you're nowhere near flowering yet don't worry, the beans will take longer to grow in cooler areas, so just remember this for later! It looks from your twitter photos that the plants are coming up nicely, which is great to see.
My field site plants currently look like below (a bit bigger after an extra week), so I'm not near flowering yet either!
If your plants are looking like they are getting ready to flower, the instruction sheets give detailed information on what to do next, and you can always get spare copies on the Downloads page. A quick reminder of what you'll need to do for impending flowers:
1) Make sure everything is potted on into the 3L pots provided. This keeps the amount of soil standardised between all experiments, so no plants are getting extra help from access to more nutrients / water than others. Top up any soil that has shrunk or washed out.
2) Pick your experimental plants! This needs to be done as soon as the first plant looks to be on the verge of flowering (unless you have one really far ahead of all the others, in which case probably don't use that one). The instructions go into detail on how to do this, but basically you will need three plants of the same size / number of stems.
3) Assign your treatments. This needs to be done randomly, which might seem a bit much for your own three plants, but on the wider experiment scale it is important that this is done. The simplest way to do this either by literally pulling names of treatments out of a hat, or better:
- Number your plants (1-3)
- Pick a treatment. Use a random number generator (I suggest using Random.org to pick one of the three plants to assign that treatment. Continue until all three are assigned.
If you have more than one site on the grounds (so, more than three plants), then all the groups need to be assigned at random.
4) Get your fleece ready! The bagged plant(s) will need to be covered before the flowers open, so now is a good time to make sure you've got the fleece / netting / etc ready to go.
5) Pick a spot for them on the grounds. If the plants are not outside yet, or not where you want to do your pollination study, then have a think where they will need to go.
The radishes probably won't be anywhere near as far ahead, as they need more time to get established and catch up.
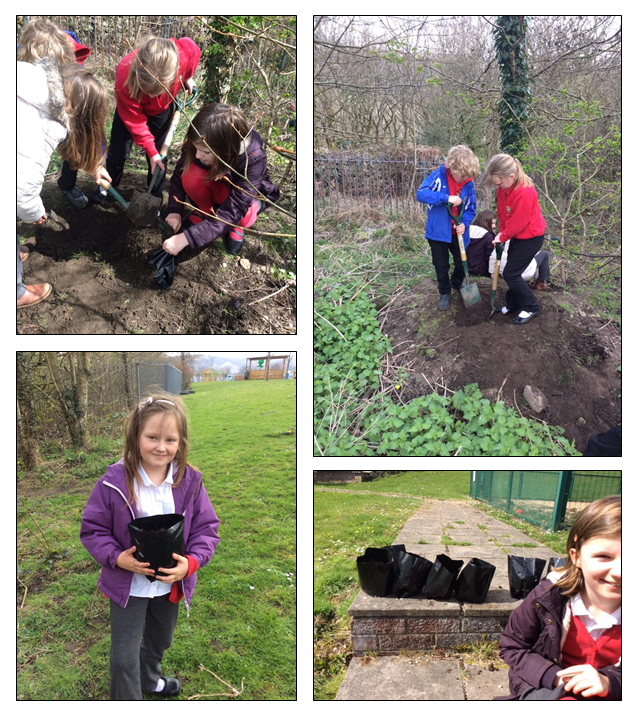
Planting up seems to have gone well, and hopefully you'll be seeing sprouting by now, even in our more northerly sites. Some photos kindly shared by email or twitter of various setups, reposted below - thanks folks!
Please note - all images posted with permission from the photographer; if there are any problems please let me know and I will respond asap.